Deprecated: str_replace(): Passing null to parameter #3 ($subject) of type array|string is deprecated in /home/dh_e8d8uw/fixitsmartguide.com/wp-content/plugins/all-in-one-seo-pack/app/Common/Traits/Helpers/Strings.php on line 129
- Fix It Smart Guide: DIY Home Improvement Made Easy - Page 2

Budget-Friendly Home Improvement Ideas for Renters

Whether you’re looking to personalize your rental space or simply want to make it feel more like home without breaking the bank, there are plenty of budget-friendly home improvement projects you can tackle as a renter. Giving your living space a refresh can be exciting, but it’s understandable if you’re cautious about making significant changes, especially if you’re on a tight budget. Fear not! There are numerous creative and cost-effective ways to upgrade your rental without losing your security deposit. Here are some ideas to inspire your next DIY adventure.

**1. Add a Fresh Coat of Paint (With Landlord Permission!):** A fresh coat of paint can work wonders in transforming any room. Consult with your landlord about their color preferences and any painting guidelines. If they approve, choose colors that reflect your style and make the space your own. A fun accent wall or a subtle, neutral tone can instantly brighten up the room. Don’t forget to carefully cover the floors and furniture during painting to avoid any accidental spills!

**2. Get Creative with Removable Wallpaper:** If you’re craving a bold statement but worry about the commitment, removable wallpaper is your best friend. It’s available in various vibrant colors, patterns, and textures. Apply it to an accent wall, the inside of bookshelves, or even on furniture. When it’s time to move, simply peel it off without causing damage to the surface. This is an excellent way to add personality and create a unique space.

**3. Update Your Kitchen with Contact Paper:** Give your kitchen a quick and affordable makeover using contact paper. This versatile material can cover countertops, cabinet doors, or even the backsplash. With numerous colors and patterns available, you can create a stylish and cohesive look throughout your kitchen. When your lease ends, simply peel it off, leaving no trace behind.

With these budget-friendly ideas, you can transform your rented home into a space that truly reflects your personality while keeping your wallet happy.

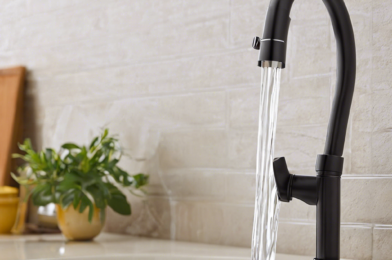
How to Fix a Leaky Faucet in 5 Easy Steps

Are you tired of that constant dripping sound and the soaring water bills that come with a leaky faucet? Don’t worry; fixing it is easier than you think! With just a few simple tools and a bit of know-how, you’ll have that faucet fixed in no time. Here’s a step-by-step guide to help you tackle this common household issue.

1. **Identify the Type of Faucet:** Before you begin, determine if you have a compression, cartridge, ball, or disc faucet. Each type disassembles a bit differently, so knowing this will guide your repair process. Modern faucets often have the type printed underneath the sink’s rim.

2. **Turn Off the Water Supply:** Locate the shut-off valves under the sink. Turning these valves clockwise will cut the water flow to the faucet, making it safe to disassemble. This step is crucial to avoid flooding your sink area!

3. **Disassemble the Faucet:** Depending on your faucet type, you might need to remove a cap, screws, or a handle lever. With that done, carefully lift out the cartridge, ball, or disc assembly. This is often where the issue lies. Clean any debris from these parts and inspect for damage.

4. **Replace Damaged Parts:** If any parts are worn or damaged, replace them with identical ones from your local hardware store. Bring the old parts for reference or take clear photos to ensure you get the right replacements.

5. **Reassemble and Test:** Put everything back together in reverse order of disassembly. Tighten all connections, then turn on the water supply valves. Check for leaks and ensure the faucet operates smoothly.

6. **Adjust as Needed:** If your faucet still drips, you might need to adjust the packing nut or valve stem for compression faucets, or the tension on the adjusting ring for ball-type faucets.

7. **Final Touches:** Once your faucet is leak-free, replace the handle and ensure it’s securely attached. Give the faucet a final polish, and you’re done!

There you have it—a straightforward DIY repair that can save you money and reduce water waste. So, roll up your sleeves and get ready to tackle that leaky faucet. With these simple steps, you’ll become the local hero who saves the day (and the water bills)!

DIY Home Decor: Easy Projects to Refresh Your Space

Are you craving a home makeover but feeling daunted by the prospect of extensive renovations? Fear not! With a bit of creativity and a few simple DIY projects, you can transform your living space into a personalized sanctuary without breaking the bank. Get ready to roll up your sleeves and embark on an exciting journey of home decor transformation!

Unlocking the Potential of Your Space:
Transforming your home into a haven of style and comfort doesn’t require a degree in interior design or a hefty budget. It’s all about tapping into your creativity and discovering the potential in everyday items. Start by decluttering to create a clean canvas. Then, envision the mood and atmosphere you want to achieve. Is it a cozy reading nook, a vibrant kitchen, or a serene bedroom retreat? Each room offers an opportunity to experiment and showcase your unique taste.

Easy DIY Projects with Maximum Impact:
Let’s dive into some simple yet effective DIY projects that will leave a lasting impression. First, consider giving your walls a fresh coat of paint. Choose colors that reflect your personality and create a cohesive theme throughout your home. For an eco-friendly twist, opt for chalk paint to upcycle furniture, turning old pieces into statement items. A new coat of paint can work wonders, whether refreshing an old dresser or transforming a plain table into a trendy focal point.

For a touch of nature, create your own hanging planters with macramé or upcycled materials. Bring the outdoors in with potted plants, adding greenery that not only looks beautiful but also improves air quality. Additionally, embrace the art of upcycling by transforming everyday items into decor pieces. Old wine bottles can become stylish vases, and worn-out denim can be repurposed into unique cushion covers.

How to Patch Holes in Walls: A Beginner’s Guide

**Fixing Up Your Walls: A Beginner’s Guide to Patching Holes**

Wall repairs can be a daunting task for anyone, especially beginners grappling with the intricacies of home improvement. Whether it’s the aftermath of a door handle’s repeated collisions or the remnants of a shelf that once adorned your wall, filling those holes is essential for a polished and put-together space. But where do you even begin? Fear not; patching holes in walls is a straightforward process that anyone can master with the right tools and guidance. This guide will walk you through the steps, ensuring your walls are as good as new in no time.

The first step is to gather your supplies. You’ll need spackling compound, sandpaper, a putty knife, and perhaps a small paintbrush for touch-ups. For small holes, spackling compound works like magic. Start by gently scraping any loose debris from the hole using a putty knife, creating a clean surface. Apply the spackling compound with the knife, overfilling the hole slightly to account for shrinkage as it dries.

Larger holes require a slightly different approach. After cleaning the area, cut a piece of drywall or a similar material to fit the hole. Secure it in place with drywall tape, then cover the tape with spackling compound, smoothing it out with the putty knife. Once the compound is dry, lightly sand the area to ensure a smooth finish. This process might take a bit longer, but the results are worth the effort.

For a seamless finish, pay attention to the drying time of the spackling compound. When it’s dry, sand the patched area lightly, blending it with the surrounding wall. A light hand and fine-grit sandpaper are key to avoiding any further damage.

Once you’ve mastered these steps, you’ll be well on your way to becoming a DIY pro! Patching holes is an essential skill for any homeowner, and with this beginner’s guide, you’re now equipped to tackle those wall imperfections with confidence.

Simple Fixes for Common Plumbing Problems

# Simple DIY Solutions to Your Everyday Plumbing Woes

When it comes to home maintenance, plumbing issues can be a real headache. From leaky faucets to stubborn clogs, these common problems can disrupt your daily routine and even lead to costly repairs if left unattended. But fear not! Many basic plumbing issues can be resolved with a bit of know-how and a few simple tools. So, before you call in the professionals, consider tackling these straightforward fixes yourself.

**Leaky Faucets:** That incessant dripping noise keeps you up at night, and it’s not doing your water bill any favors either! The issue usually lies in the faucet’s internal components. Disassemble the faucet handle to access the inner workings. You’ll often find that the culprit is a worn-out washer or O-ring. Simply replace these inexpensive parts, and your faucet should be as good as new. Remember to shut off the water supply to the faucet before you begin any repairs.

**Clogged Drains:** Whether it’s your kitchen sink or bathroom tub, a clogged drain can quickly turn into a major inconvenience. Before reaching for the chemical drain cleaners, try some DIY solutions. A plunger is an effective and eco-friendly tool to clear minor blockages. For tougher clogs, consider using a drain snake – a long, flexible auger that can break up or retrieve the blockage. Remember to always use these tools carefully to avoid damaging your pipes.

In many cases, prevention is the best cure. Regular maintenance, such as cleaning faucet aerators and showerheads, can keep your plumbing system in good health. Additionally, being mindful of what goes down the drain can prevent future clogs.

By tackling these simple fixes, you can save time, money, and the hassle of dealing with more extensive plumbing issues. So, roll up your sleeves and give these DIY solutions a try! You might be surprised at how easily you can conquer these common plumbing problems.

How to Paint a Room Like a Pro: Step-by-Step Guide

Whether you’re a novice painter or looking to improve your DIY skills, transforming a room with a fresh coat of paint is an exciting project. Follow this step-by-step guide to achieve professional-looking results and bring new life to your space. Before diving into the process, take the time to prepare your workspace to ensure a smooth and efficient painting experience.

Start by clearing the room of furniture and other items, leaving only the essentials. Cover the floor and any remaining furniture with drop cloths to protect them from paint splatters. Don’t forget to use painter’s tape to mask off areas like the ceiling, door frames, and baseboards. This will ensure clean lines and prevent paint from seeping where it’s not wanted. Proper preparation is essential to achieving a polished finish.

Now, let’s talk about the tools you’ll need to get the job done right. Gather paint rollers, brushes of various sizes, a paint tray, and a ladder or step stool for reaching those high places. The quality of your tools can significantly impact the outcome, so opt for ones that are well-made and suitable for the task at hand. For paints, choose a high-quality brand and consider factors like finish and color to match your desired aesthetic.

When you’re ready to begin, start by applying a coat of primer to the walls. Primer provides a smooth base for the paint, ensures better adhesion, and may even prevent stains from showing through. Once the primer is dry, it’s time to tackle the paint. Using a roller, apply the paint in a consistent, even manner, working in small sections to avoid lap marks. For detailed areas, use a brush to maintain precision and control.

After the first coat, allow it to dry completely before applying a second coat for full coverage and a rich, uniform color. With these steps and attention to detail, you’ll be able to paint a room like a pro, creating a stunning and personalized space in your home.

10 Easy DIY Home Repairs Anyone Can Do

# 10 Easy DIY Home Repairs to Tackle Like a Pro

Tackling home repairs doesn’t have to be intimidating or reserved for professional handymen. Many common household issues are surprisingly easy to fix, and with a little guidance, you can become your own DIY hero. So, roll up your sleeves and get ready to save some money and gain the satisfaction of fixing things around the house!

1. **Fixing a Running Toilet:** Stop wasting water and money by addressing that annoying running toilet. Often, the culprit is a worn-out flapper. Simply turn off the water supply, empty the tank, and replace the flapper with a new one. It’s a quick fix that can save gallons of water daily.

2. **Patching Small Holes in Drywall:** Whether it’s from hanging pictures or accidental damage, small holes in your walls can be easily patched. Grab some spackling paste, a putty knife, and fine-grit sandpaper. Apply the paste to the hole, smooth it out, and let it dry. Lightly sand the area, prime if needed, and paint over it, making the repair virtually invisible.

3. **Unclogging Drains:** Clogged sinks and showers are common nuisances that you can tackle without calling a plumber. Start with a simple plunger, which can often dislodge minor clogs. If that doesn’t work, consider using a drain snake to break up the blockage. Chemical drain cleaners should be a last resort due to their harsh nature.

4. **Fixing a Leaky Faucet:** A dripping faucet is not only annoying but also wasteful. In most cases, the problem lies in the faucet’s washer or O-ring. Turn off the water supply, disassemble the faucet, and replace the worn-out part. You’ll save water and enjoy the peaceful silence of a drip-free faucet.

5. **Tightening Loose Door Hinges:** Squeaky or loose door hinges can be easily fixed with a screwdriver and some lubricating oil. Tighten the hinge screws first, and if they won’t tighten, replace them with longer ones. Apply a few drops of oil to the hinge to ensure smooth, quiet operation.

6. **Replacing a Light Fixture:** Give your room an instant upgrade by replacing outdated light fixtures. Turn off the power to the circuit, remove the old fixture, and disconnect the wires. Connect the new fixture’s wires, secure it in place, and restore power. It’s a bright idea that can transform your space.

DIY home repairs not only save you money but also empower you with valuable skills. These simple tasks can be accomplished with basic tools and a little guidance, so don’t be afraid to roll up your sleeves and tackle them head-on. Stay tuned for more DIY adventures!