Deprecated: str_replace(): Passing null to parameter #3 ($subject) of type array|string is deprecated in /home/dh_e8d8uw/fixitsmartguide.com/wp-content/plugins/all-in-one-seo-pack/app/Common/Traits/Helpers/Strings.php on line 129
- Fix It Smart Guide: DIY Home Improvement Made Easy

Basic Woodworking Projects for Beginners

Are you new to the world of woodworking and eager to get your hands dirty with some basic projects? Woodworking is an incredibly rewarding craft that allows you to create beautiful and functional pieces while honing your skills. For beginners, it’s essential to start with simple projects that build confidence and develop fundamental techniques. Here’s a guide to some basic woodworking projects that will have you falling in love with this timeless craft.

**Creating a Wooden Picture Frame:**
One of the simplest and most satisfying projects for beginners is crafting a custom picture frame. Start by selecting a suitable wood species, considering options like pine, oak, or walnut, depending on your desired finish. Measure and mark the wood to the dimensions you need for your picture, then cut the pieces to size. Use a mitre saw or a mitre box to achieve precise 45-degree angles for the corners. Assemble the frame using wood glue and small nails or brads, ensuring the corners are tight and well-aligned. Finish your frame by sanding it smooth and applying a stain or paint to suit your personal taste. This project teaches basic measuring, cutting, and finishing techniques while resulting in a practical and personalized piece.

**Building a Wooden Jewelry Box:**
Create a stylish home for your accessories with a wooden jewelry box. Choose a design that incorporates a lid, a base, and perhaps a simple divider system inside. Cut the pieces to size, ensuring accuracy for a snug fit. You can experiment with basic joinery techniques like butt joints or even try your hand at more advanced methods like dovetail joints. A jewelry box project will introduce you to the art of sanding and finishing to create a smooth, polished surface. Add a charming touch by installing a small hinge for the lid and a delicate catch to keep it securely closed.

As you embark on these projects, remember that woodworking is a journey of continuous learning. Each project will teach you valuable lessons and techniques, building your skills and confidence. So, pick up your tools, embrace the process, and enjoy the satisfying world of woodworking. Happy crafting!

How to Refinish Furniture: A Beginner’s Guide

Refinishing old furniture is a great way to breathe new life into tired pieces and add a unique, personalized touch to your home décor. Whether you’re an aspiring DIY enthusiast or simply looking to upcycle an old find, this beginner’s guide will equip you with the essential knowledge to transform furniture from drab to fab. With a few simple techniques and the right tools, you’ll be ready to embark on your furniture refinishing journey. So, let’s dive into the exciting world of furniture restoration!

The first step in refinishing furniture is to assess the piece. Determine the type of material it is made of, such as wood, metal, or plastic. Each material requires a different approach. For wooden furniture, inspect the condition of the finish. Is it scratched, stained, or simply faded? Understanding the extent of the damage will help guide your refinishing process. If you’re dealing with metal furniture, look for rust and corrosion, as these will require specific treatments to ensure a smooth and durable finish.

Next, gather your supplies. For wooden pieces, you’ll typically need sandpaper, a sanding block, and a suitable stripping agent to remove the old finish. Consider using a non-toxic, eco-friendly stripper for a safer refinishing process. For metal furniture, you might require a wire brush, rust remover, and a good-quality primer and paint. Always wear protective gear, including gloves, safety goggles, and a respirator, when working with chemicals and paints.

Now, let’s get started with the refinishing process. Begin by stripping the old finish from the furniture. Apply the stripping agent following the manufacturer’s instructions, allowing it to penetrate the old finish. Once the finish has been effectively softened, use your scraping tools to remove the old paint or varnish. This process may take some time and effort, but it’s crucial for achieving a smooth, professional-looking finish.

Simple Ways to Make Your Home More Energy Efficient

Making your home more energy-efficient doesn’t have to be a daunting or expensive task. With a few simple adjustments and mindful practices, you can reduce your energy consumption and create a greener living space. Here are some easy and practical ways to get started:

**Start with Lighting:** Lighting your home efficiently is an excellent first step towards energy conservation. Replace traditional incandescent bulbs with LED (Light Emitting Diode) bulbs. LEDs are highly energy-efficient, using up to 90% less energy and lasting 25 times longer than incandescent bulbs. They provide the same warm glow and brightness while significantly reducing your electricity usage. You can also install dimmer switches and motion sensors to ensure lights are only on when needed, saving both energy and money on your utility bills.

**Appliance Efficiency:** Upgrading old appliances to more energy-efficient models can make a big difference. Look for appliances with the ENERGY STAR label, ensuring they meet strict energy-efficiency guidelines set by the Environmental Protection Agency. Modern appliances, such as refrigerators, washing machines, and dishwashers, are designed to use less water and electricity, helping you save energy and reduce your carbon footprint. Even small changes, like switching to a laptop instead of a desktop computer, can lead to substantial energy savings.

**Smart Thermostat Control:** Heating and cooling systems are major energy consumers in homes. Invest in a smart thermostat that learns your preferences and adjusts temperatures accordingly. Programmable thermostats allow you to set schedules, so you aren’t heating or cooling an empty house. By optimizing your heating and cooling systems, you can reduce energy waste and enjoy a comfortable living environment.

**Seal and Insulate:** Proper insulation and sealing of your home can prevent heat loss during winter and keep your home cool in the summer, reducing the strain on your HVAC system. Focus on sealing gaps around doors, windows, and any openings where air can escape. Insulate your attic and walls to maintain a consistent indoor temperature and decrease the workload on your heating and cooling appliances.

How to Caulk Windows and Doors: Keep the Cold Out

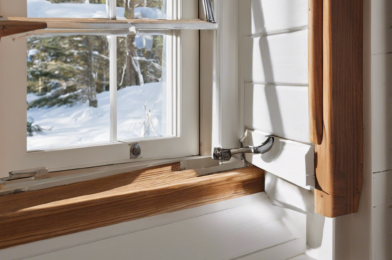
Caulking your windows and doors is an effective way to seal gaps, improve energy efficiency, and keep the cold air out during the chilly winter months. Whether you’re dealing with drafty old windows or simply looking to enhance your home’s insulation, caulking can make a significant difference. Not only will it help keep your home warmer, but it can also lower your energy bills by reducing the workload on your heating system. So, let’s dive into the step-by-step process of caulking your windows and doors.

Before you begin, inspect your windows and doors to identify areas where air might be leaking. Common problem areas include the corners of window frames, the gaps between the window or door frames and the wall, and any cracks or gaps in the trim. Pay close attention to these areas as you’ll need to apply caulk to seal them effectively. Once you’ve identified the problem spots, it’s time to gather your supplies.

You’ll need a high-quality caulk specifically designed for windows and doors. Silicone or acrylic latex caulks are excellent choices for this task. Ensure you have a caulk gun for easy application, and consider investing in a caulk finishing tool for a smooth, professional finish. Additionally, gather some soapy water and a damp cloth for cleanup, along with a razor blade or caulk removal tool if you need to remove old caulk.

Now, let’s get started with the application process. Begin by cleaning the areas you’ve identified for caulking. Remove any dirt, dust, or old caulk residue using your soapy water and cloth. Dry the surfaces thoroughly before applying the new caulk to ensure proper adhesion. Load the caulk tube into the caulk gun and cut the tip at a 45-degree angle, creating a small opening for the caulk to flow through.

Apply the caulk along the gaps and cracks, maintaining a smooth and steady pace. Press the trigger of the caulk gun gently, allowing the caulk to flow out smoothly without over-applying. Aim for a consistent bead of caulk, following the contours of the window or door frames.

Stay tuned for the next section where we’ll discuss tips for achieving a neat finish and ensuring a long-lasting seal.

Easy Electrical Fixes You Can Do Yourself

Are you tired of waiting for an electrician to fix that faulty outlet or dimming lights? Many minor electrical issues around the home can be quickly and easily resolved with a little know-how and the right tools. Not only will you save time, but you’ll also feel empowered by your new DIY skills. Let’s shed some light on a few simple electrical fixes that anyone can tackle.

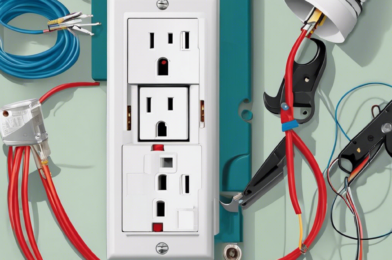
One of the most common problems is a loose or broken electrical outlet. This can lead to sparking, overheating, or simply a frustrating lack of functionality. The fix is straightforward: turn off the power to the outlet, remove the cover plate, and inspect the wiring connections. If any wires are loose, tighten them with a screwdriver. If a wire is damaged or detached, carefully reconnect it to its correct terminal, ensuring a secure fit. With the connections secured, the outlet will likely function as good as new!

Another frequent issue is a light fixture that has stopped working. In many cases, the culprit is a blown bulb or faulty light switch. Changing the bulb is easy, but if that doesn’t solve the problem, try replacing the switch. Shut off the power, remove the old switch, and install the new one, connecting the wires to their corresponding terminals. This fix can bring new life to your lighting system.

Safety is paramount when working with electricity. Always ensure the power is off before handling any electrical components, and never attempt complex repairs beyond your comfort level. It’s always best to seek professional assistance for significant electrical work or if you’re unsure about a particular task.

How to Fix Squeaky Floors: Easy Solutions

Have you ever been startled by a squeaky floorboard, wondering if it’s an intruder or simply an annoying sound? Squeaky floors can be a common issue in many homes, but fear not, as there are several straightforward solutions to this problem. Say goodbye to those annoying creaks and ensure your floors remain sturdy and quiet.

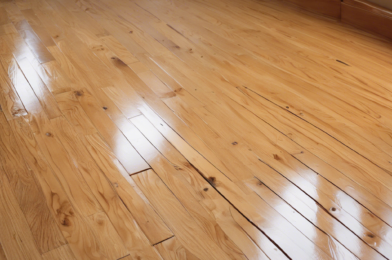
Identifying the root cause is the first step to fixing a squeaky floor. Most squeaks occur when two wood surfaces rub against each other due to loose nails or subfloor movement. This friction results in the high-pitched noise we all recognize. Understanding the underlying problem will guide you in choosing the best method for a lasting solution.

One of the most accessible tools for fixing squeaky floors is a screw or nail. For a quick fix, drive 2-inch coated deck or siding screws through the flooring and subfloor into the underlying joist. Pre-drilling pilot holes will ensure you don’t split the floor. If screws are not an option, you can use 8d ring-shank flooring nails. These nails have a ringed shaft that grips the wood tightly, providing a more secure connection.

If you want a less invasive approach, you can try using talcum powder or powdered graphite. Sprinkle either of these substances between the floorboards or into the joints to reduce friction and silence the squeaks. This method is ideal for those who want a quick fix without drilling or nailing.

For more extensive repairs, consider reinforcing the subfloor. Cut a 6-inch-wide strip of 3⁄4-inch plywood that’s as long as the joist spacing. Then, apply construction adhesive to the joists and the top of the subfloor and fasten the plywood with 1 1⁄4-inch screws. This method provides additional support and can significantly reduce squeaking.

Finally, maintaining proper humidity levels within your home can prevent wood from shrinking and expanding, which often causes squeaks. Investing in a humidifier or dehumidifier can help maintain consistent moisture levels, ensuring your floors remain quiet.

Say goodbye to squeaky floors with these simple solutions. Whether you opt for a quick fix or a more involved repair, you’ll soon enjoy peace and quiet with every step you take.

DIY Yard Projects to Boost Curb Appeal

Are you tired of looking at your dull, uninviting yard? It’s time to roll up your sleeves and tackle some DIY projects that will transform your outdoor space and make your neighbors green with envy! Boosting your curb appeal doesn’t have requisite breaking the bank. With a little creativity and elbow grease, you can create a stunning yard that will be the talk of the town. So, let’s dive into some fun and affordable DIY yard projects!

One easy way to enhance your yard is by creating a beautiful garden bed. Start by choosing a sunny spot and marking out the shape you desire with a hose or rope. Remove the grass, dig up the soil, and enrich it with compost to create a healthy environment for your plants. Select a mix of flowering perennials, shrubs, and ornamental grasses to add color, texture, and interest. Consider adding a focal point, such as a small tree or a uniquely shaped shrub, to draw the eye. Finish it off with a layer of mulch to suppress weeds and give it a polished look. Gardening is not only rewarding but also a great way to add value to your home and improve your mental well-being.

Another quick fix to boost curb appeal is updating your front door. A fresh coat of paint in a bold color can instantly transform the look of your home’s exterior. Add some stylish house numbers and a unique door knocker to give it a personalized touch. If you’re feeling crafty, consider building a wooden planter box to hang next to your front door and filling it with seasonal flowers. This simple addition will create a warm and welcoming entrance for your guests.

Want to add some coziness to your yard? Build your own fire pit! This project may require a bit more effort, but the end result will be worth it. Start by checking local regulations and ensuring you have enough space. You can choose to build a fire pit using stone or brick, creating a circular shape with a level base. Ensure you follow safety guidelines and maintain a safe distance from flammable structures. A backyard fire pit is the perfect spot for hosting gatherings, roasting marshmallows, and creating lasting memories.

How to Unclog a Drain: Simple Solutions That Work

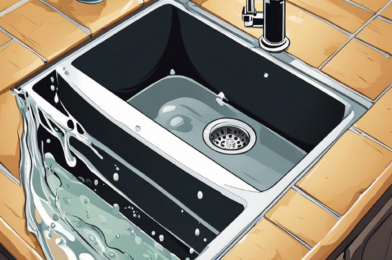
Having a clogged drain can be a frustrating household issue, but don’t worry – there are several simple and effective methods to get your drains flowing freely again. Whether it’s a stubborn kitchen sink or a slow-draining bathtub, you can tackle the problem without calling a plumber. Here’s a step-by-step guide to unclogging your drains like a pro.

First, try the classic baking soda and vinegar method. Pour a pot of boiling water down the drain to loosen the clog. Follow this with a mixture of 1/2 cup of baking soda and 1/2 cup of white vinegar. The fizzing reaction will help break down organic matter. After 15-20 minutes, flush with another pot of boiling water. This natural, eco-friendly approach is a great initial step.

If the clog persists, it’s time to bring out the plunger. Choose a plunger with a fold-out edge to create a strong seal over the drain. Fill the sink or tub with enough water to cover the plunger head, then plunge vigorously for 20-30 seconds. The suction should dislodge the blockage. This method is especially effective for food, hair, and grease clogs.

For stubborn clogs, a drain snake or auger is your next best tool. Feed the snake into the drain until you feel resistance, then crank the handle to break through or pull out the obstruction. This is an excellent option for reaching deeper clogs in pipes. Be gentle to avoid damaging your pipes.

Sometimes, prevention is the best cure. Regularly pour a mixture of baking soda and vinegar down your drains to keep them clear. This routine maintenance can prevent buildup and future clogs. Additionally, using drain screens or strainers to catch hair and food scraps can significantly reduce the likelihood of clogs.

Unclogging a drain yourself is often straightforward and cost-effective. With these simple solutions, you can keep your plumbing in good shape. Remember to act quickly when you notice a slow drain, as prompt action can prevent more serious issues down the line. Happy unclogging!

The Best Tools Every Homeowner Should Have

Whether you’re a new homeowner or have been maintaining your own space for years, having the right tools can make all the difference in keeping your home in tip-top shape. While it might be tempting to call in the professionals for every little fix, investing in some essential tools will not only save you money but also empower you to tackle those DIY projects with confidence. From assembling furniture to hanging shelves, these tools will become your trusty companions for all your home improvement adventures. So, let’s dive into the ultimate list of must-have tools for every homeowner.

Every homeowner should start building their toolkit with the basics. A sturdy hammer is essential for hanging pictures, driving nails, and even removing them when needed. When it comes to screwdrivers, having a set covering various head types and sizes is ideal. Phillips and flathead screwdrivers are the most common, but don’t forget the smaller precision ones for those tiny screws on electronics. An adjustable wrench and a pair of pliers will come in handy for tightening and loosening various fixtures around the house.

Another essential that no homeowner should be without is a reliable power drill. This versatile tool will make light work of hanging curtains, assembling furniture, and even tackling more complex projects like building your own deck. Look for a cordless drill with variable speed settings and a kit that includes different drill and driver bits. This way, you’ll be prepared for a wide range of tasks without needing to change tools constantly.

Measuring and marking tools are also crucial for accurate DIY projects. A tape measure is an absolute must for any homeowner, as it allows you to measure everything from furniture dimensions to wall spaces for hanging art. Additionally, a level will ensure that your shelves are straight and your pictures don’t look like they’re sliding off the wall!

Stay tuned for the next paragraphs, where we’ll dive into more specialized tools that will take your DIY skills to the next level!

How to Install Shelving: Step-by-Step Guide

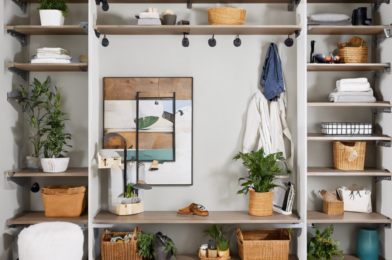
Whether you’re looking to showcase your book collection or simply need more storage space, installing shelving can be a practical and aesthetically pleasing solution for your home. Shelves are not only functional but also offer a great opportunity to display your personal style. However, the process of installing shelves might seem daunting to those who are new to DIY projects. Fear not! This step-by-step guide will walk you through the process, ensuring you achieve professional-looking results. By the end of this project, you’ll have a beautiful and functional shelving system that will impress both you and your guests.

First, you’ll need to gather your tools and materials. The essential items include a measuring tape, a level, a pencil, a stud finder, a drill, the appropriate drill bits, screws, wall anchors, and, of course, the shelves themselves. Ensure you have the correct type of screws and wall anchors for your specific wall material, such as drywall or masonry.

Start by determining the desired height for your shelves. Use the measuring tape and pencil to mark the wall at the chosen height. It’s crucial to ensure that the shelves are level, so use your level to verify the accuracy of your marks. Next, use the stud finder to locate the studs in your wall. Mark these positions clearly, as they will be the ideal spots to secure your shelves firmly.

Now it’s time to drill. Using the appropriate drill bit for your screws, drill pilot holes at the marked positions. These holes should be slightly smaller in diameter than your screws to ensure a tight fit. If you’re drilling into drywall without hitting a stud, you’ll need to use wall anchors to provide a secure hold for your screws.